> ## Documentation Index
> Fetch the complete documentation index at: https://docs.dodopayments.com/llms.txt
> Use this file to discover all available pages before exploring further.
# Storefront
> Create a branded, mobile-friendly Dodo Payments store that lists your one-time payment and subscription products, with no website to build.
 A Storefront is a branded online store, hosted by Dodo Payments, where customers browse your one-time payment and subscription products and buy them through Dodo Payments checkout. You sell online without building or maintaining a website.
## Key Highlights of the Feature
1. **Branded Storefront**
* Customize your store with a store name, logo, and banner.
* Share your store URL, for example `store.dodopayments.com/your-store`.
2. **Product Segregation**
* The store groups your products into a **Products** section for one-time payment products and a **Subscriptions** section.
3. **Simple Checkout Flow**
* Customers select a product and quantity, then click **Buy now** to go to Dodo Payments checkout.
4. **Publish/Unpublish**
* Choose which products appear on your store from the dashboard, where you can add or remove them at any time.
5. **No Extra Setup**
* You don't need a separate CMS. You manage pricing, descriptions, and subscription details in the dashboard, and the store uses them.
6. **Mobile-Friendly**
* The storefront layout is responsive, so it works on phones, tablets, and desktops.
## Store Front Setup
To set up and manage your storefront, follow these steps.
A Storefront is a branded online store, hosted by Dodo Payments, where customers browse your one-time payment and subscription products and buy them through Dodo Payments checkout. You sell online without building or maintaining a website.
## Key Highlights of the Feature
1. **Branded Storefront**
* Customize your store with a store name, logo, and banner.
* Share your store URL, for example `store.dodopayments.com/your-store`.
2. **Product Segregation**
* The store groups your products into a **Products** section for one-time payment products and a **Subscriptions** section.
3. **Simple Checkout Flow**
* Customers select a product and quantity, then click **Buy now** to go to Dodo Payments checkout.
4. **Publish/Unpublish**
* Choose which products appear on your store from the dashboard, where you can add or remove them at any time.
5. **No Extra Setup**
* You don't need a separate CMS. You manage pricing, descriptions, and subscription details in the dashboard, and the store uses them.
6. **Mobile-Friendly**
* The storefront layout is responsive, so it works on phones, tablets, and desktops.
## Store Front Setup
To set up and manage your storefront, follow these steps.
 ### Accessing Your Storefront Settings
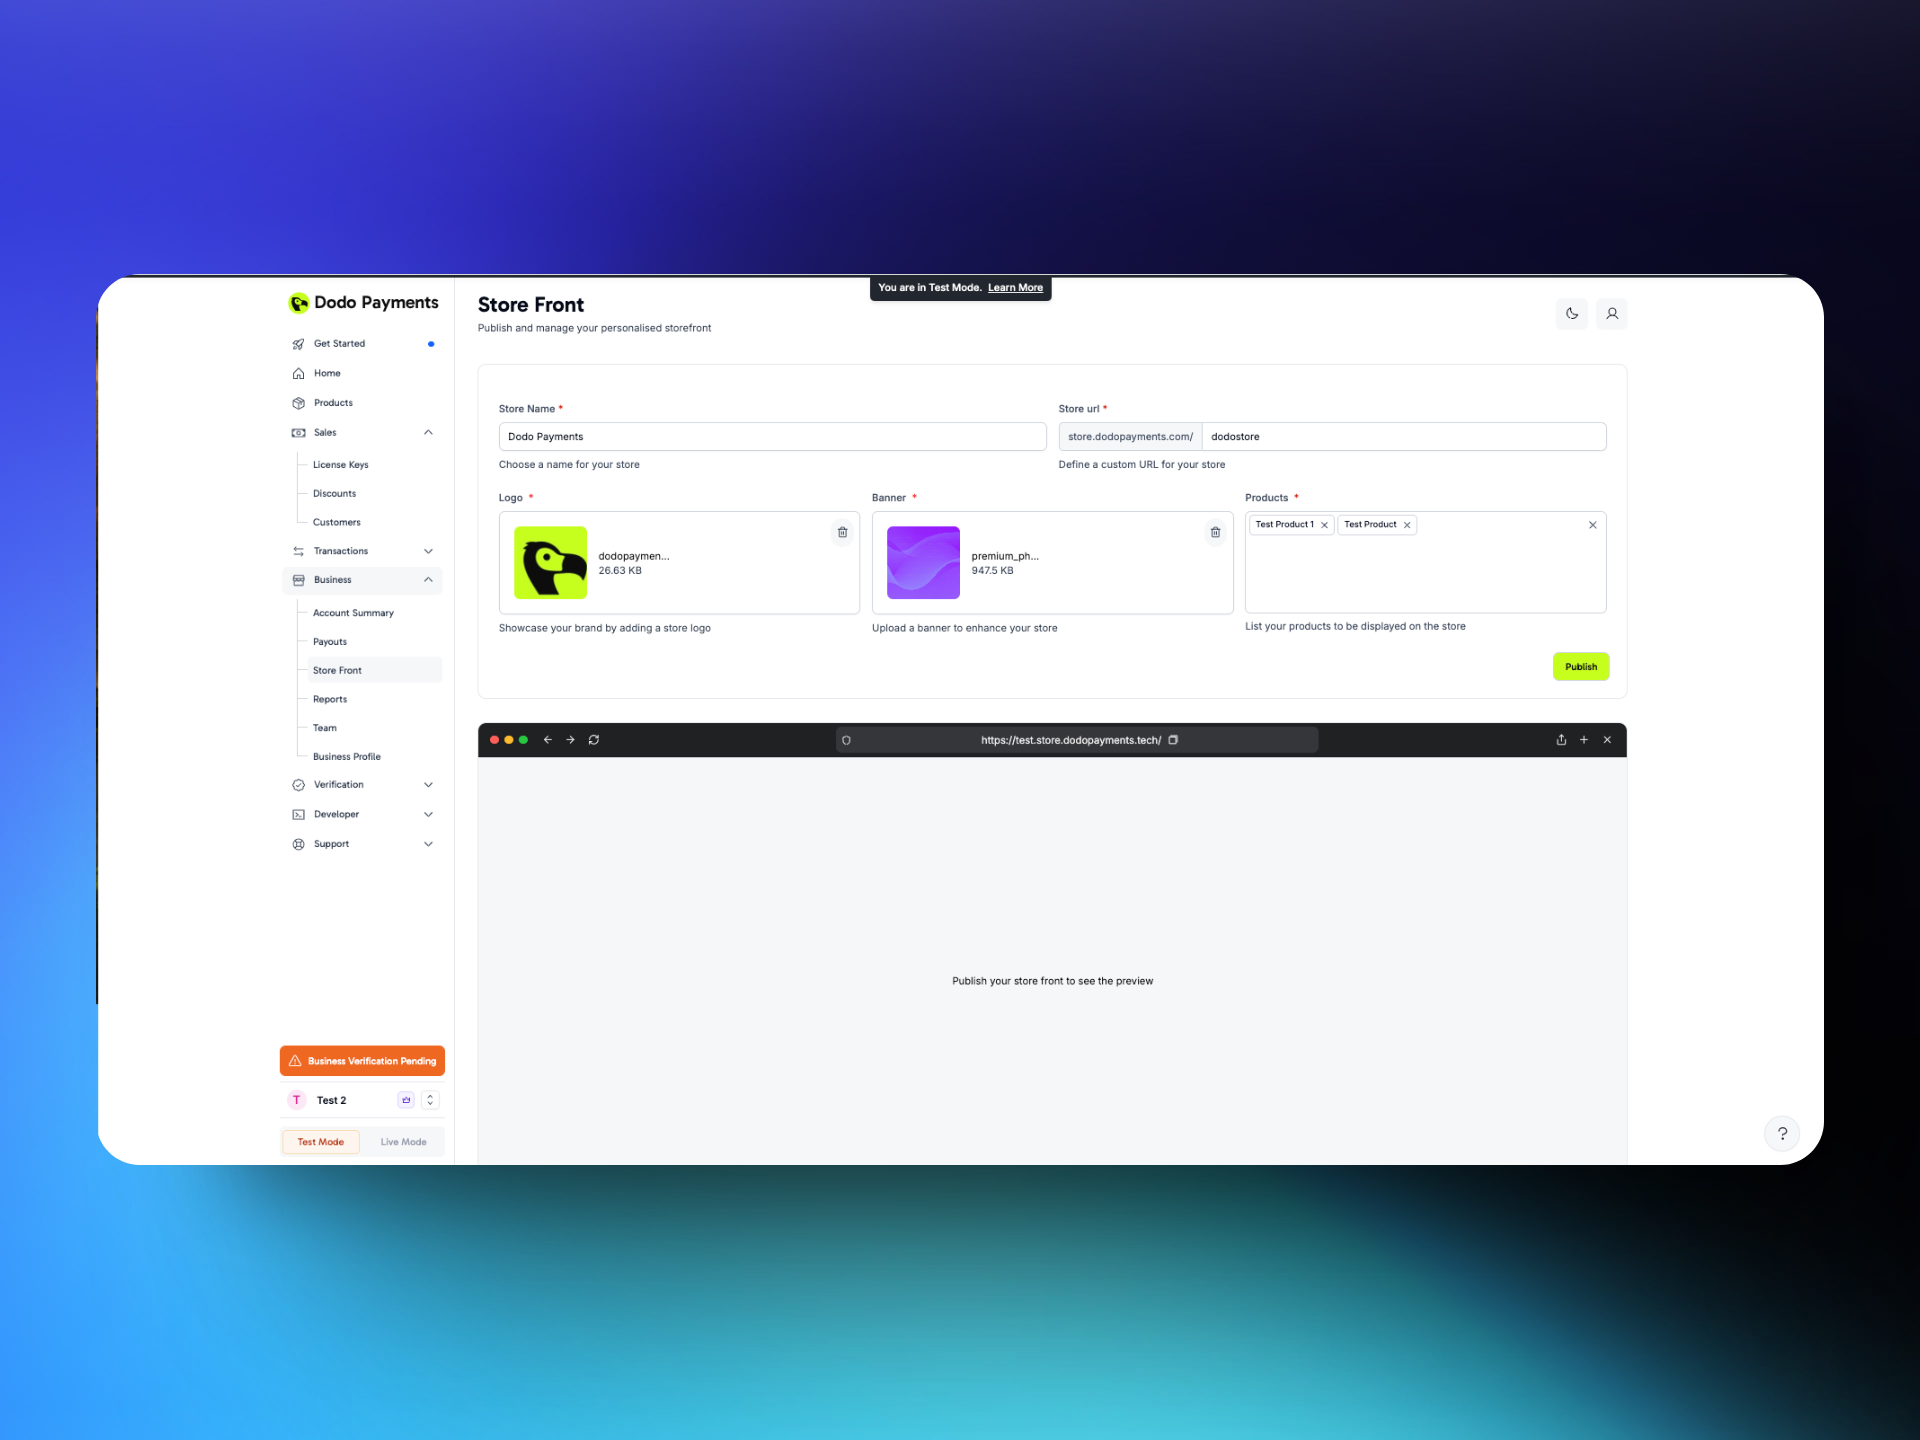
1. In the Dodo Payments dashboard, go to **Settings → Storefront**.
### Store Branding
1. **Store Name**: Enter the public name of your store. It appears at the top of your storefront.
2. **Store Logo**: Upload a square image of your brand logo.
3. **Store Banner**: Upload a 16:9 banner for the top of the storefront. The recommended size is 1920×1080. Keep your logo and key text centered, because wider screens crop the top and bottom.
4. **Store URL**:
* Enter the slug for your store address, for example `store.dodopayments.com/my-store`.
* The slug can contain only lowercase letters, numbers, and hyphens. You can change it later.
5. **Listed Products**: Select the products you want to show on your storefront.
Logo and banner images can be PNG, JPG, JPEG, GIF, SVG, or WebP files of up to 5 MB.
### Saving & Viewing Your Store
### Accessing Your Storefront Settings
1. In the Dodo Payments dashboard, go to **Settings → Storefront**.
### Store Branding
1. **Store Name**: Enter the public name of your store. It appears at the top of your storefront.
2. **Store Logo**: Upload a square image of your brand logo.
3. **Store Banner**: Upload a 16:9 banner for the top of the storefront. The recommended size is 1920×1080. Keep your logo and key text centered, because wider screens crop the top and bottom.
4. **Store URL**:
* Enter the slug for your store address, for example `store.dodopayments.com/my-store`.
* The slug can contain only lowercase letters, numbers, and hyphens. You can change it later.
5. **Listed Products**: Select the products you want to show on your storefront.
Logo and banner images can be PNG, JPG, JPEG, GIF, SVG, or WebP files of up to 5 MB.
### Saving & Viewing Your Store
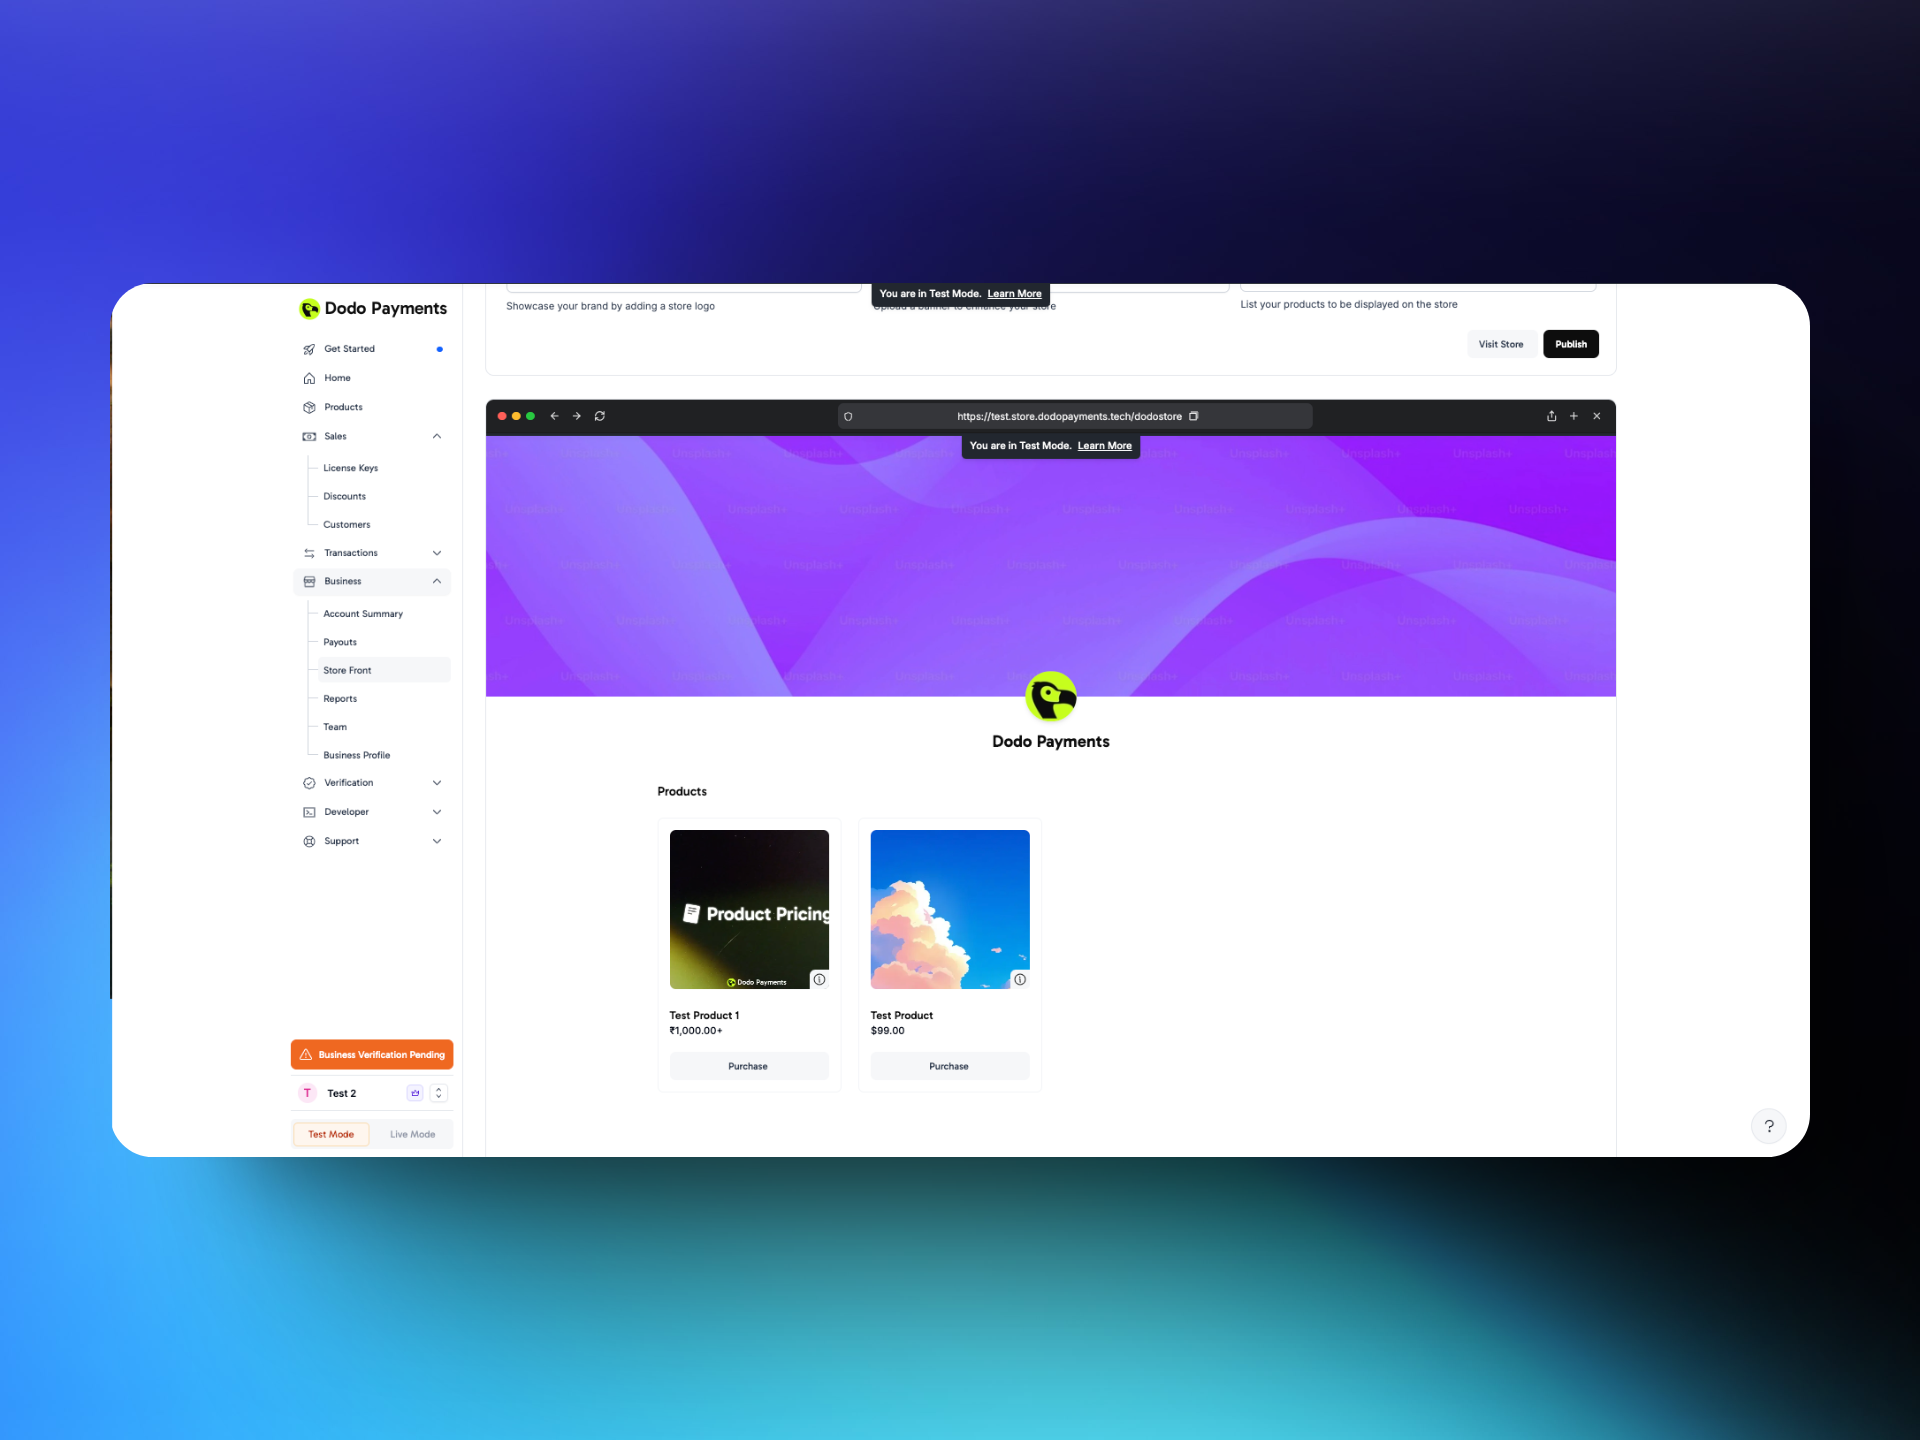 1. **Click Publish**: Click **Publish** to save your storefront setup and the products you listed.
2. **Preview Store**: Preview your storefront at its URL, or click **Visit Store** to open it.
3. **Share URL**: Share the link with your customers by email, on social media, or on your website.
### Test Mode
1. **Click Publish**: Click **Publish** to save your storefront setup and the products you listed.
2. **Preview Store**: Preview your storefront at its URL, or click **Visit Store** to open it.
3. **Share URL**: Share the link with your customers by email, on social media, or on your website.
### Test Mode
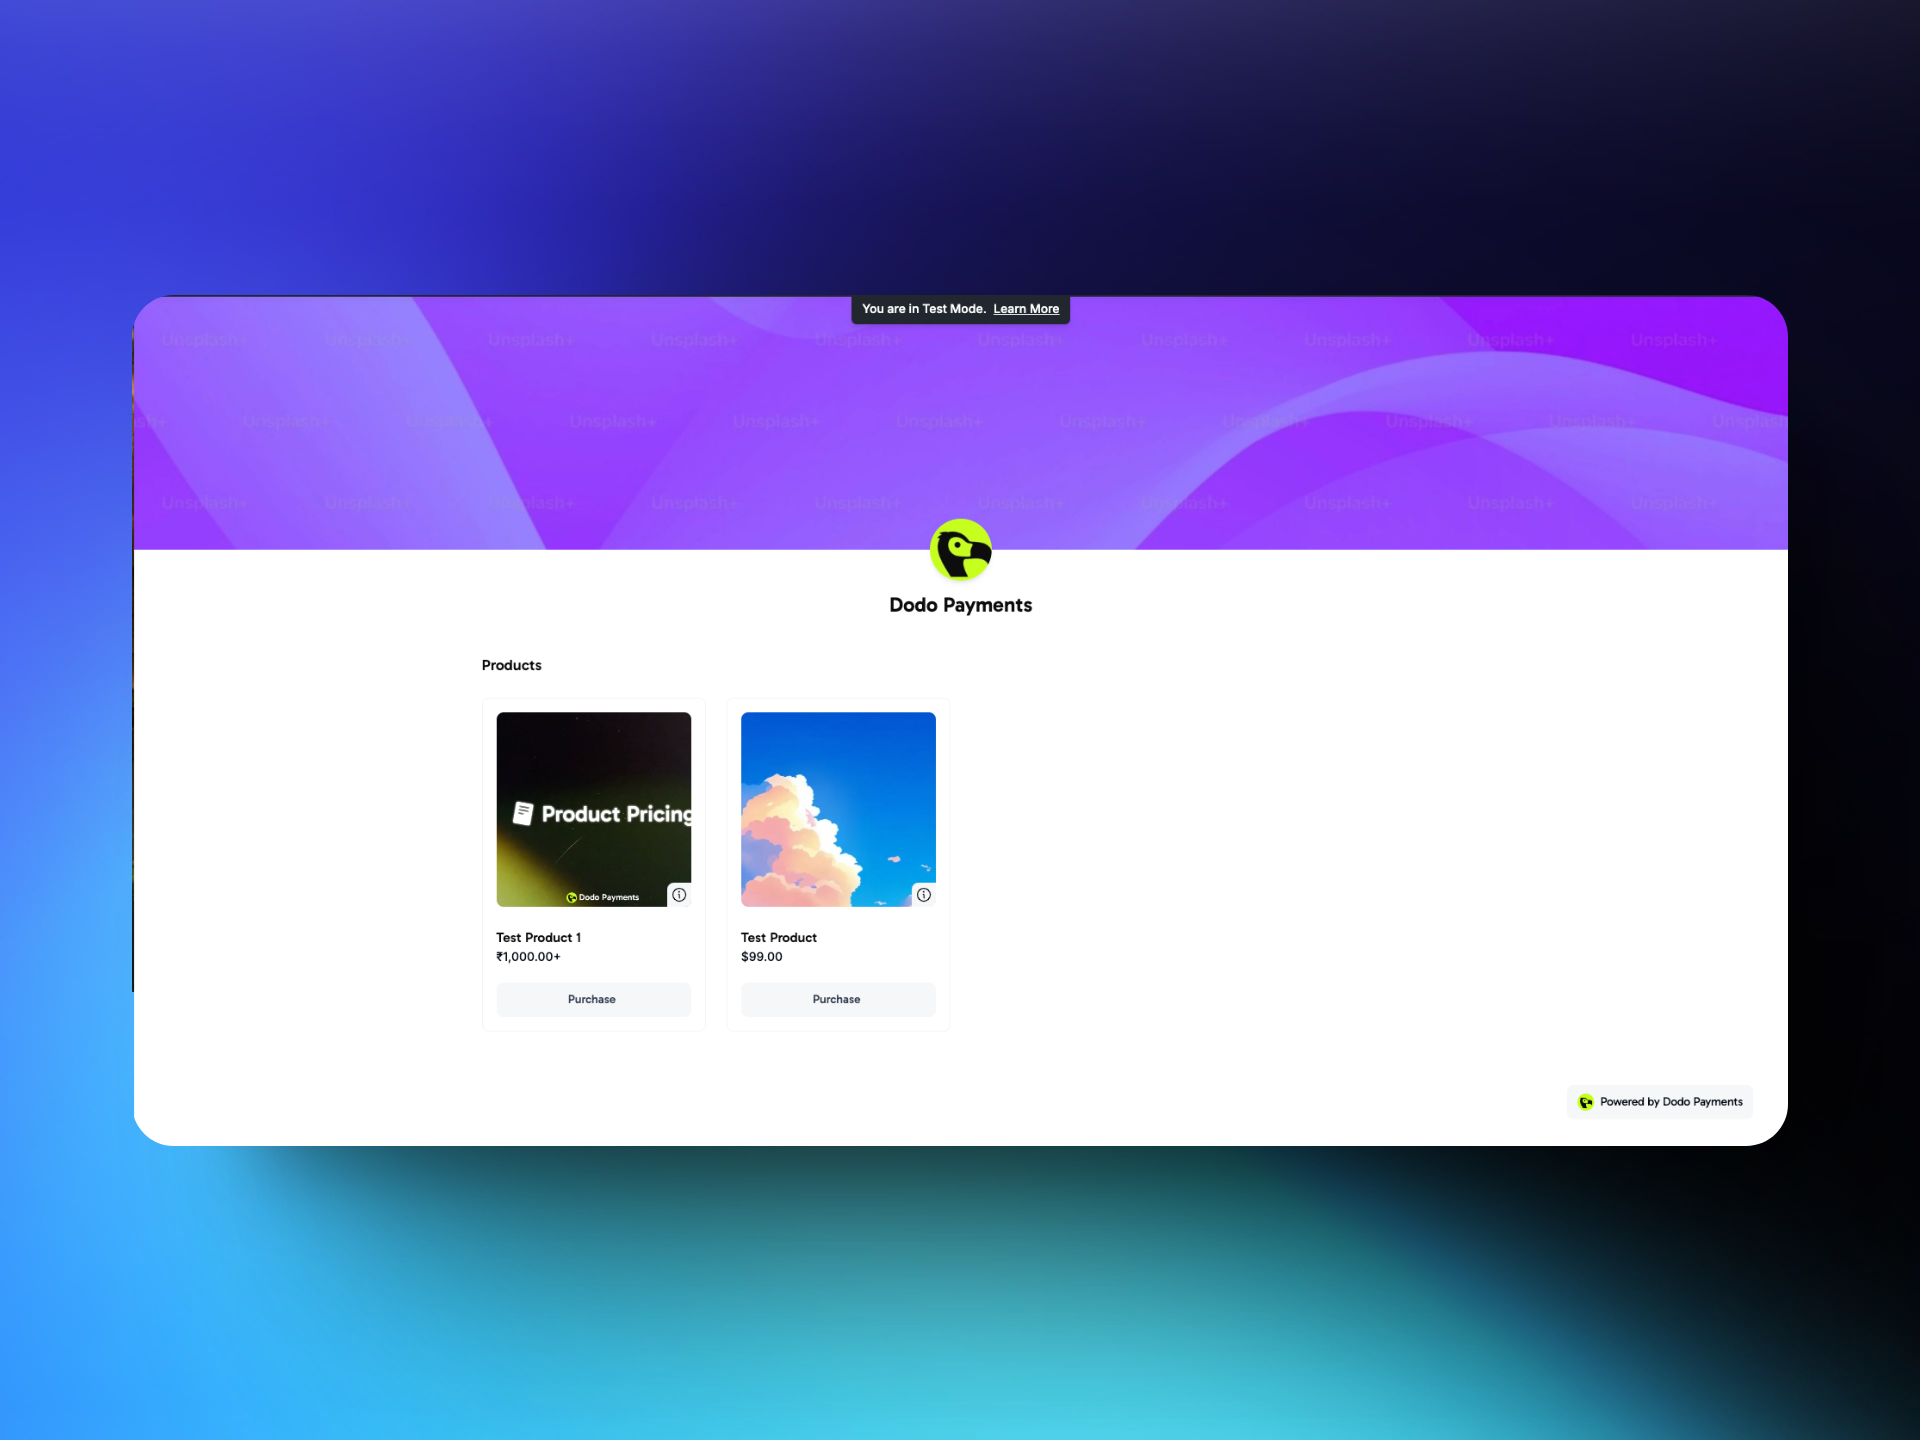 Test mode and live mode have separate storefronts. A storefront you create in test mode shows a test mode banner at the top of the page.
Use test mode to try the browsing and purchase flow yourself. To take real payments, share the live mode store link with your customers.
When you're happy with how your store looks in test mode, you can copy the design and storefront branding to live mode instead of rebuilding them. See [Copy Design From Test to Live Mode](/features/design#copy-design-from-test-to-live-mode).
## Customer Experience
Test mode and live mode have separate storefronts. A storefront you create in test mode shows a test mode banner at the top of the page.
Use test mode to try the browsing and purchase flow yourself. To take real payments, share the live mode store link with your customers.
When you're happy with how your store looks in test mode, you can copy the design and storefront branding to live mode instead of rebuilding them. See [Copy Design From Test to Live Mode](/features/design#copy-design-from-test-to-live-mode).
## Customer Experience
 ### Landing on the Storefront
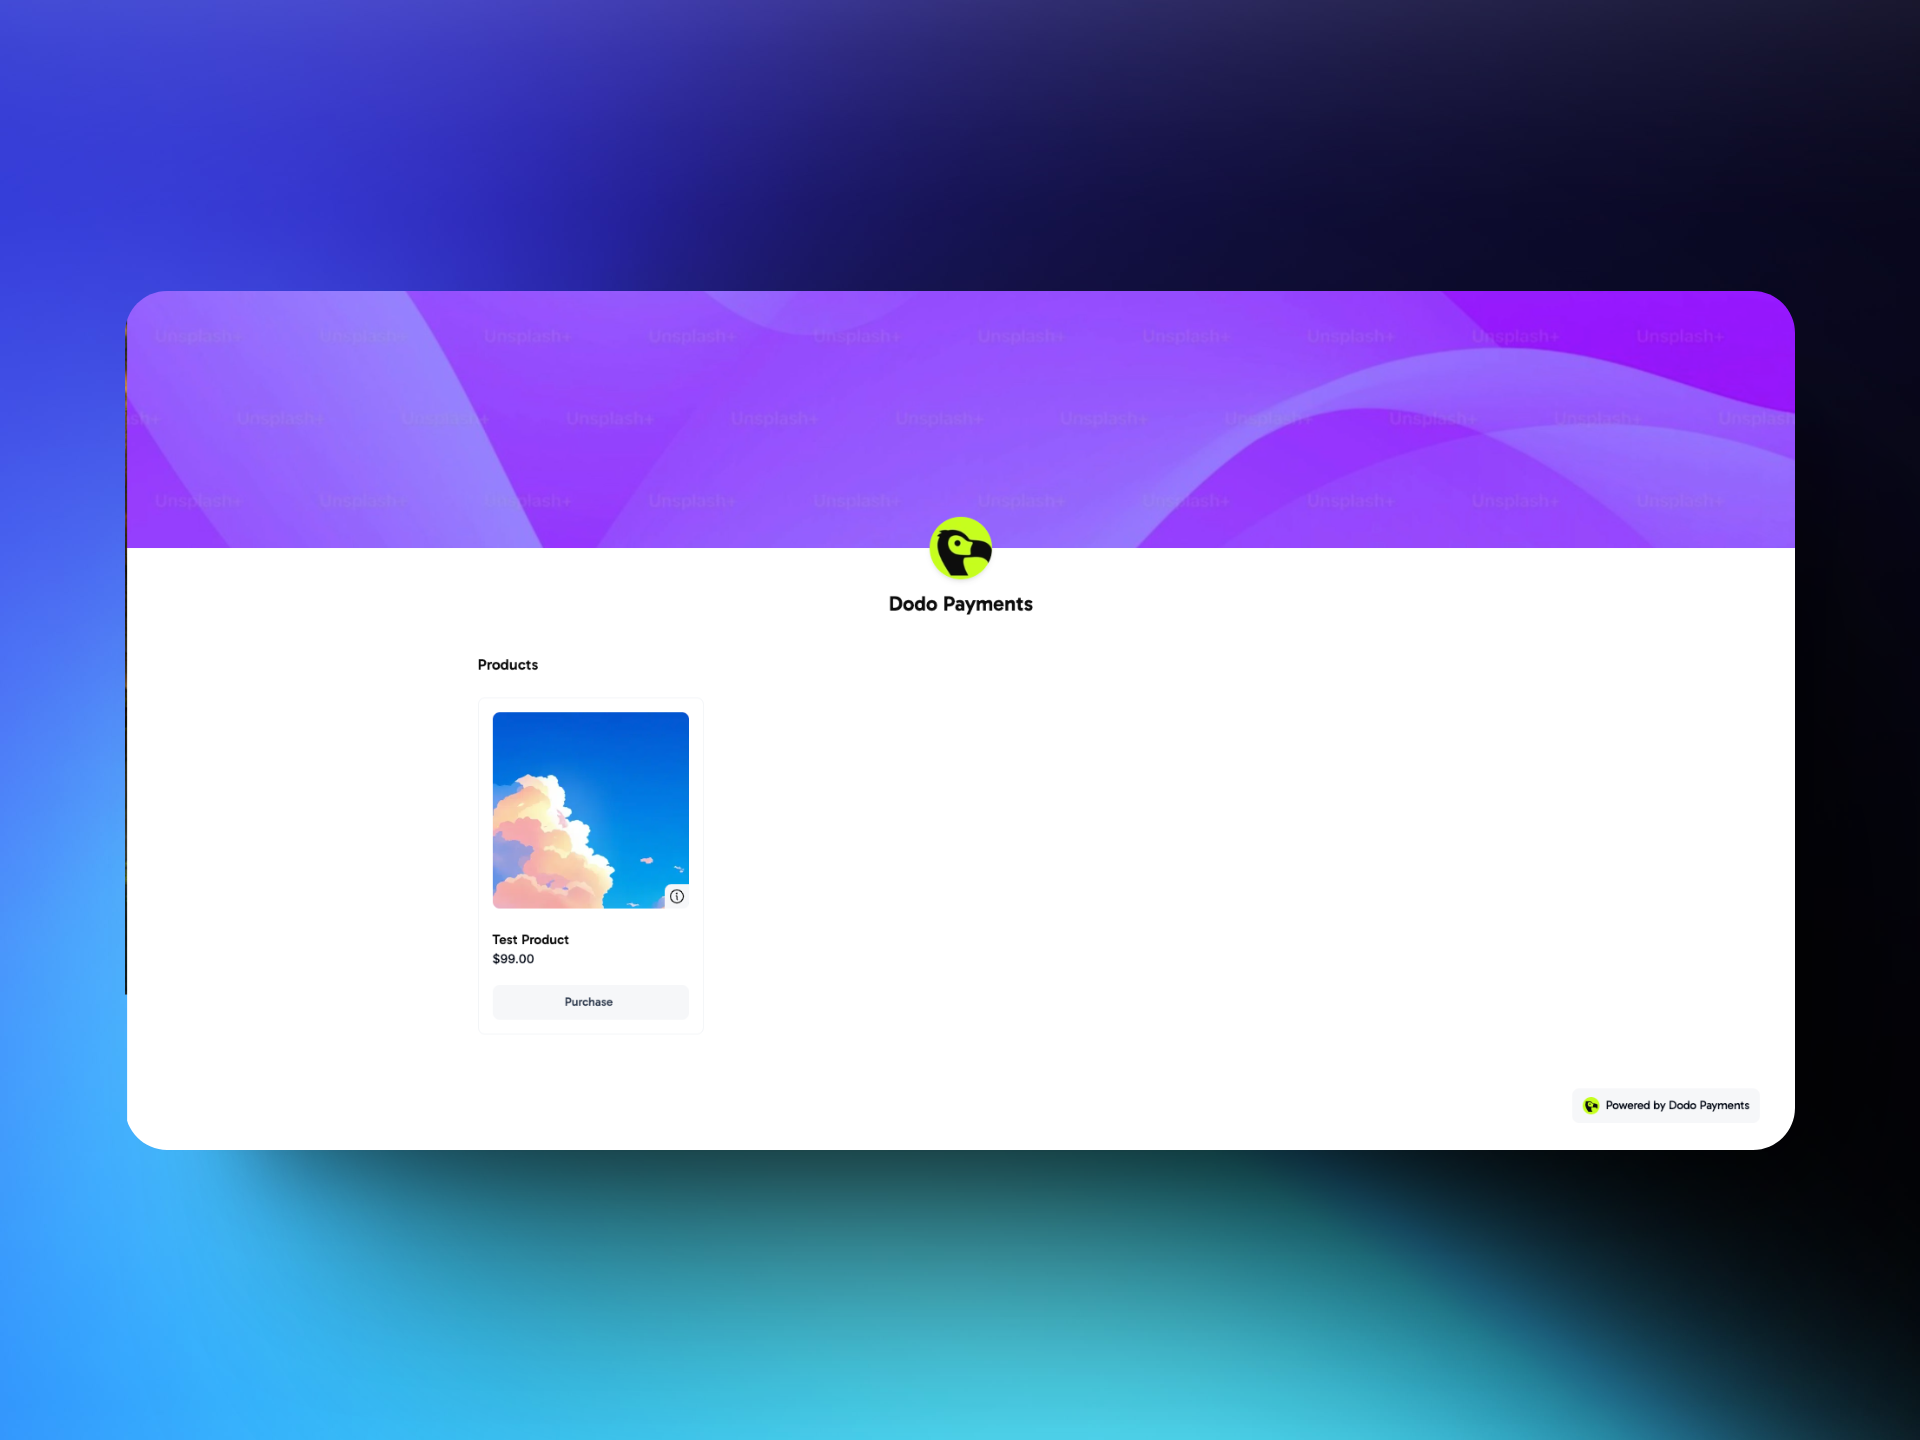
* **Visual Branding**: Customers see your store name, logo, and banner first.
* **Organized Products**: Products appear in two sections: **Products** for one-time payments and **Subscriptions**.
### Browsing Products
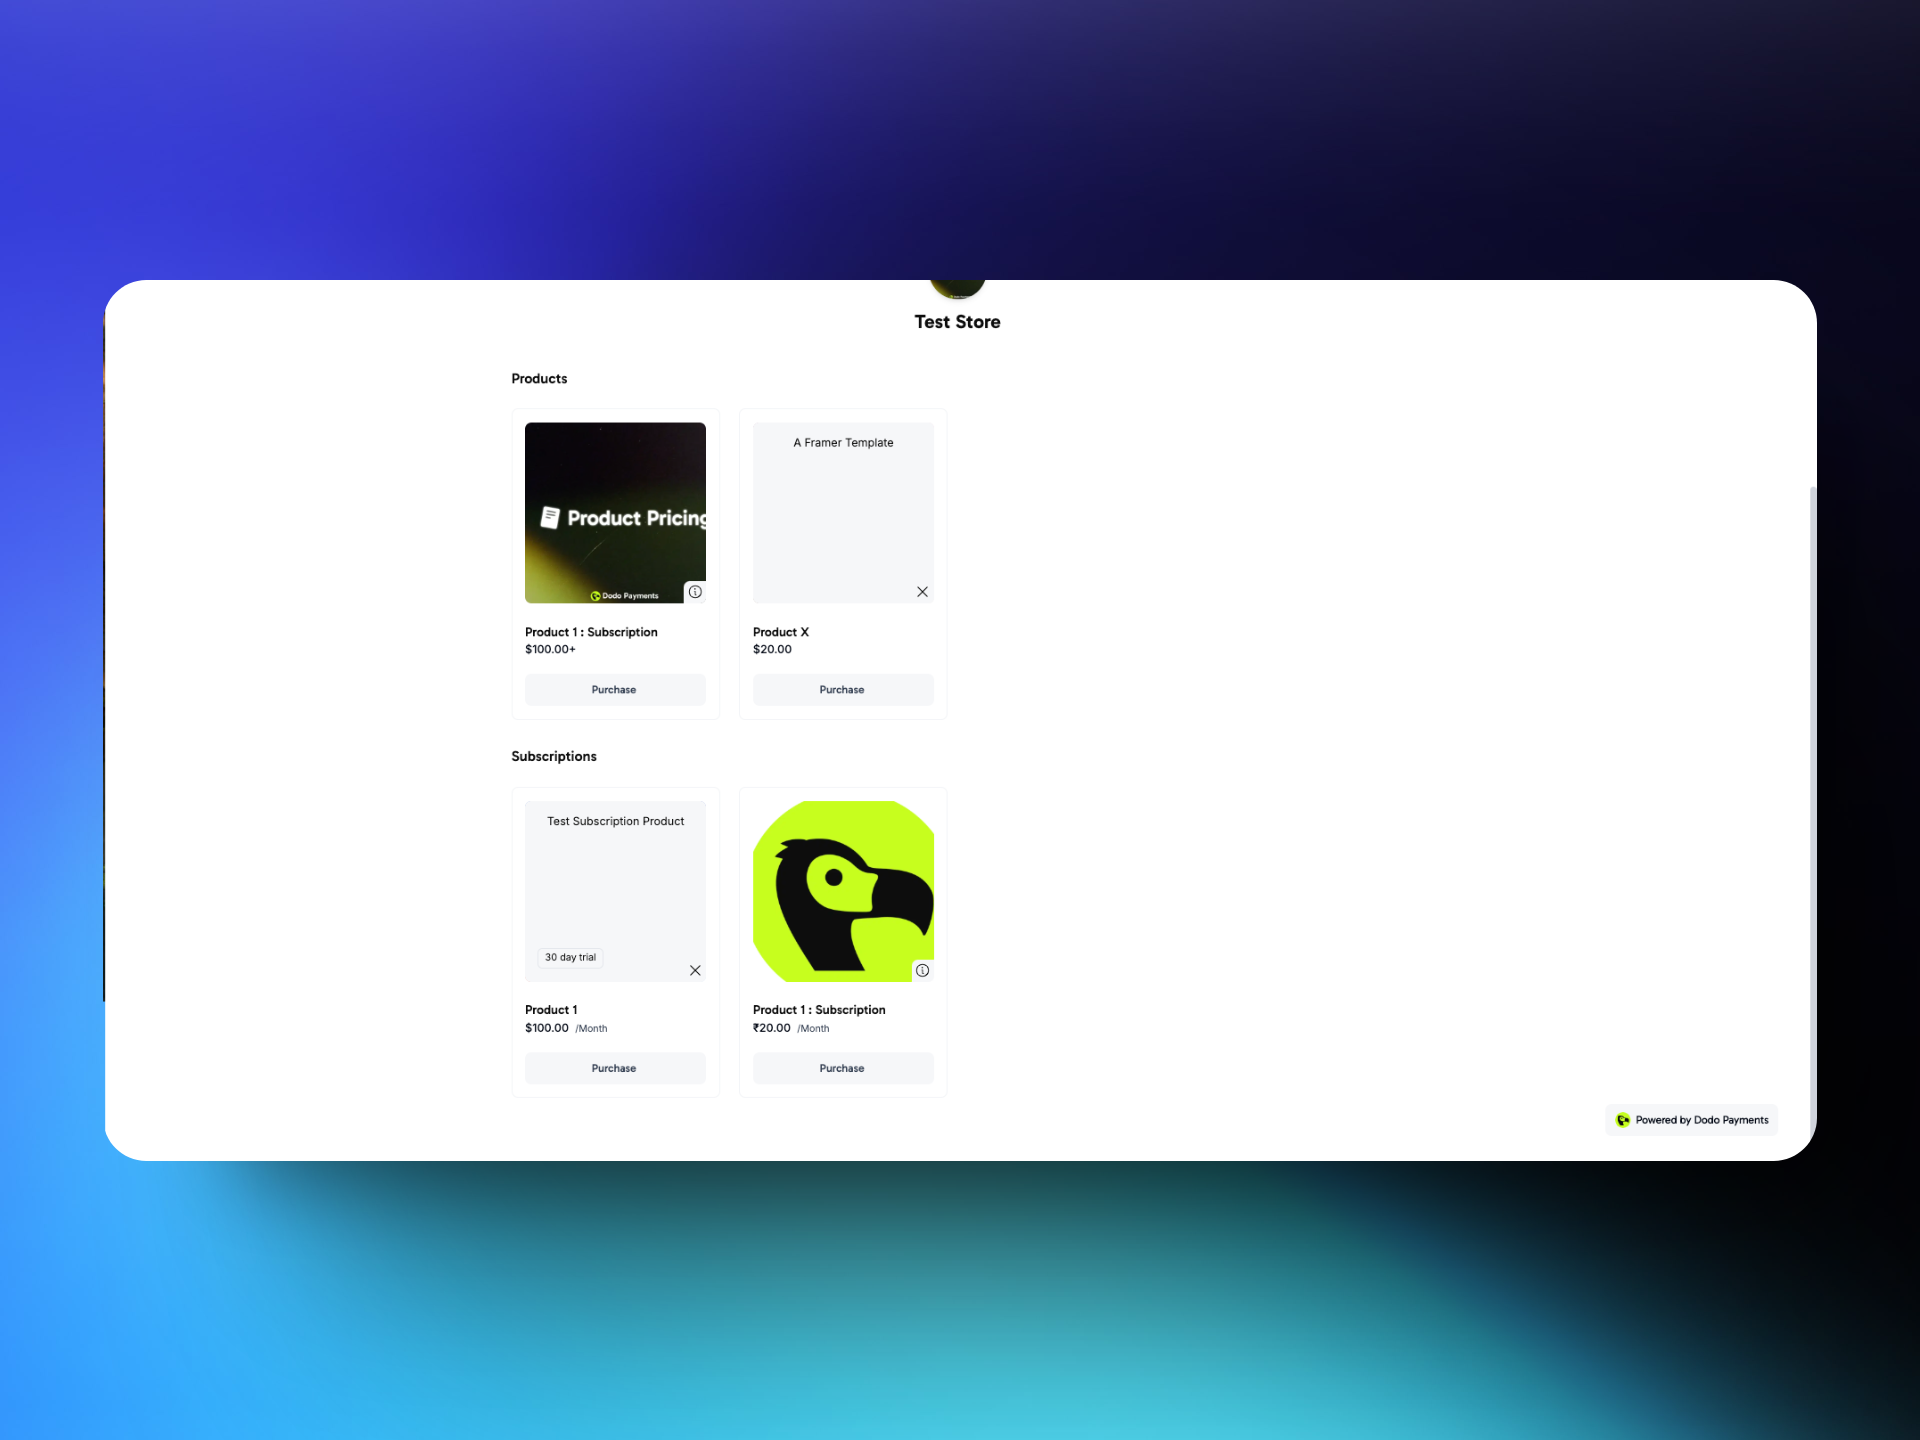
* **Product Cards**: Each card shows the product name, description, and price. To read the description, customers click the **i** icon on the bottom right of the card.
* **Quantity Selection**: Customers choose how many items to buy.
* **Subscription Frequency & Trial**: Subscription cards show the billing frequency, for example monthly, and any free trial, for example a 7-day trial.
### Landing on the Storefront
* **Visual Branding**: Customers see your store name, logo, and banner first.
* **Organized Products**: Products appear in two sections: **Products** for one-time payments and **Subscriptions**.
### Browsing Products
* **Product Cards**: Each card shows the product name, description, and price. To read the description, customers click the **i** icon on the bottom right of the card.
* **Quantity Selection**: Customers choose how many items to buy.
* **Subscription Frequency & Trial**: Subscription cards show the billing frequency, for example monthly, and any free trial, for example a 7-day trial.
 ### Buying Process
1. **Select Buy Now**: The customer clicks **Purchase** on a product, selects the quantity, and clicks **Buy now**.
2. **Redirect to Dodo Payments Checkout**: The customer goes to Dodo Payments checkout and completes the secure checkout flow there.
3. **Confirmation**: After a successful payment, Dodo Payments shows a confirmation. Storefront checkout links don't include a redirect URL, so you can't send storefront customers to your own "Thank You" page.
Customize your storefront's appearance with pre-built themes, typography, colors, and a live preview on the Design page.
This documentation is built and hosted on [Mintlify](https://mintlify.com), a developer documentation platform.
### Buying Process
1. **Select Buy Now**: The customer clicks **Purchase** on a product, selects the quantity, and clicks **Buy now**.
2. **Redirect to Dodo Payments Checkout**: The customer goes to Dodo Payments checkout and completes the secure checkout flow there.
3. **Confirmation**: After a successful payment, Dodo Payments shows a confirmation. Storefront checkout links don't include a redirect URL, so you can't send storefront customers to your own "Thank You" page.
Customize your storefront's appearance with pre-built themes, typography, colors, and a live preview on the Design page.
This documentation is built and hosted on [Mintlify](https://mintlify.com), a developer documentation platform.